maandag 21 april 2014

Review of Lightzone


Ok, so imagine your windows-based laptop decides to break down. 
Not savable,  reinstall windows does not solve it (still don’t know why)
and you don’t feel like spending money on a new operating system / laptop. 
What do you do? Use an illegal copy of windows? Possibly, but not as stable, can be irritating, and of course it’s not allowed. 
So, the only option I had was to switch to Linux.
At the time it felt like a last resort, but I’ve come to like it a lot. 

Everything works fine (even found a better replacement for MS Word
than Open / Libre office called Kingsoft Office)
but there is one problem. I’m a photographer, and my entire workflow
was dependent on View NX and Capture NX2 of Nikon. 
So what are you gonna do when you can’t develop your RAW images
anymore?  The open source universe has quite a lot of options
 for RAW developers, but there are two programs that are well known:
Rawtherapee and UFRaw. 
I tried them, but never really got to like them. Yet my Linux-photography adventures are not over because I found Lightzone. 
 
A few years ago Lightzone was a paid program, but when the company behind it went bankrupt Lightzone’s code
was given to the open source community. The heroes behind
the project developed it a bit more, and here is an open source
version of Lightzone.
It’s free and it works on Mac, Windows and Linux (yay!). So how does it stand up against my previous workflow, the one that
I really liked? Lightzone shares more similarities with
Lightroom except for light being used in the name.
There’s the same distinction between a library module and a developing
module. The library module works ok, it’s a bit slow but it works.
Because Lightzone does not have ability like Capture NX2 to read the
picture presets, you have to develop the RAW file from scratch.
Although I do not really like that, it’s not too bad compared to the other
RAW developers.
And of course you can make use of pre-sets.
The first thing Lightzone assumes you want to adjust are your
basic settings, the exposure, colour temperature etc. Which works just fine.
Of course there are there is a dock for the obligatory sliders like
saturation, vibrancy and you can add or subtract certain colours.
But where are the curves? I need to tweak this file. 
Simple answer, there aren’t any.
Lightzone relies on a system they call the zonemapper which is based on
the zone system. There are a 17 bars that you can drag up or down.
These bars correspond to a zone in your photograph.
At the top right corner you see a version of your photo with 17 shades of
gray that correspond to these bars.
Hover over one of these bars and the shade of gray in the photo lights up. 


Now you know what area of the photo you’ll be adjusting when you
drag the bar somewhere. And although it takes some getting
used to, it’s really quite a good system. I feel I can be a bit

more precise, and it feels like I have more overview.
Although this system takes some getting used to I feel like it’s
the main selling point of the software (and that it works on Linux). All the adjustments you make are non-destructive,
and can be changed when you go back into your editing process.
You can also change their positions, which basically makes them
act as layers. Speaking of layers, every adjustment
is a layer, because you can change the blending mode, change
their position in the layer stack, and use something like
a layer mask. Unfortunately there are no brushes available
in Lightzone. There are some pretty good selection tools,
but now you have to trace every subject, and I have not yet
found the possibility to change the opacity of the layer mask
regionally. Although this system has some potential, it either
needs some development or Lightzone needs brushes. 

Problems
Although I really like Lightzone some essential features are missing
or just aren’t very good. I already mentioned the lack of brushes,
but at least There’s a good alternative for it. There are no tools available to correct CA.
The sharpening function works ok-ish except for that it introduces
quite a lot of artifacts to the image, (of course) especially at higher ISO’s.
I don’t like the results from the noise reduction function.
You get the water-Painting effect pretty fast, while some noise
still might be visible. Luckily there is other software available
like GIMP (which I absolutely love) to take care of those functions.
But as GIMP only takes JPG’s, I’d rather do it in Lightzone. 

Conclusion
If I’m honest, I use Lightzone out of necessity. I do like the principles
of the software (it’s open-source and free, it works on an open-source
and free operating system, making use of the zone system rather than
curves) it just needs some maturation. When I take the same image and
develop it both in Lightzone and Capture NX2, the image from Lightzone
tends to look better in terms of exposure and colours. However, this is
probably due to laziness as Capture NX2 applies the picture style and
white balance that I had set in my camera. However, in terms of
sharpening,noise reduction and CA correction, 
Lightzone gets blown out of the water. 
This has led me to do the following: did I shoot portraits or landscape on
an ISO lower than 800? I just leave my Linux system running, and develop
in Lightzone, and sharpen in GIMP. Did I shoot in a dark situation,
(e.g. sports, wildlife etc), I reboot my computer into windows
(wait literally 15 minutes for it to boot) and start up Capture NX2
(and hate windows some more because it’s slow). 
So would I recommend the software? YES! Yes there are flaws,
and in my view the software has to mature a bit, but it works, I can get
good results out of it, and best of all it’s a FREE CROSS-PLATFORM RAW DEVELOPER. Just try it out, share it with your photo
buddies because it’s a fun piece of software. 


zaterdag 6 juli 2013

review of the Nikkor 35-105mm f/3.5-4.5

The 35-105mm was Nikon’s first variable aperture lens, but compared to the modern lenses it does not lose a lot of light. Rather than closing down to f/5.6 at the maximum zoom range, it closes down to f/4.5. Besides the useful focal range (especially on film / full frame) it is also capable of a reproduction ration of 1:4. So this seems like an interesting lens. And to be honest that’s the reason I bought it, because I was curious and not because I needed it.

Of course this is an older zoom lens, which means that the quality is not comparable to current Nikkor zoom lenses. However the image quality is surprising, the lens is far more usable than I anticipated. If you punish this lens it does show its shortcomings, but if you are aware of them you can make pretty good use of this lens. So one of the things you should not expect this lens is to produce good image quality when you are focused on infinity and you use a wide open aperture. Then the image becomes muddy and it reminds a bit of a smart phone image. However, if you close down one stop and try not to be at the extremes of the focal length you can get a very acceptable image. On a scale of 1 to 10 I would give it a 6.5 or 7 while the 50mm would get a 10. So if I want an extremely sharp image for a large print I would not use this lens. And I will probably never take it when I go out to make landscape photographs.


However the lens is quite sharp when you focus a bit closer. The normal focus ring allows you to focus up to 1.4 meters, but there is also a macro ring. Depending on your focal range you can get a magnification of 1:4 (35mm) or 1:5.5 (105mm). And the images I got out of that mode are very good. Again, on a scale of 1 to 10 I would give it an 8. And since we discuss close-up photography we might as well discuss bokeh. The bokeh of the lens is alright, it is not really bad but also nothing outstanding. The aperture blades are not curved so you can see the aperture blades back in the bokeh highlights. Normally I don’t find it distracting but with this lens it can be a bit distracting from time to time depending on the actual aperture you use. But if you have less out of focus highlights, shoot at an aperture which suits the bokeh the bokeh is quite nice. The area which is closest to the focus point can be a bit distracting depending on the background, but generally it looks good.

As you can see, the ground which is only just out of focus is a bit busy. But besides that I like the bokeh in this photograph


This lens flares quite easily. If you can find an appropriate lens hood you should use it to avoid unwanted flare. But the flare of this lens is quite beautiful, it shows that this lens contains out of a lot of lens elements. You can control the flare to a certain extend by zooming a bit in or out. Zooming just a bit can change the look of the flare dramatically and I you have the time it is worthwhile to experiment with the best focal range. Of course this lens has other short comings as well. It has quite some distortion I’ve read on other websites. But until now it hasn’t bothered me that much. I have to admit, I do not shoot architecture, but the distortion isn’t too obvious and I generally do not correct for it. Another issue this lens apparently has is vignetting. After all, it’s an old zoom. But I have not noticed it yet. I’m sure there is some, but it hasn’t bothered me yet even though I don’t like it if you can see imperfections in my photographs which were not intended for the viewer to see. (flare on the other hand can be a nice creative tool)


So I’ve discussed the image quality of this lens, but I don’t think that’s the most important I like about this lens. I have sharper lenses. But the thing about this lens is that it gives reasonable image quality while also being very versatile. You can focus reasonably close and the focus is just nice, it’s the classic Nikkor quality. I like the focal range on DX (but that’s because I don’t like shooting with lenses wider than 28 on DX) especially for a general walk-around lens. It has a 52mm filter thread which is shared with a lot of other Nikkor lenses. And the build quality is just great. The main quality of this lens is the handling. Of course I can get better image quality by shooting with a modern zoom or a prime, but there’s just something about this lens that keeps making me use it. Because what’s image quality worth when your photos suck? I really like my primes, and I think that they help me to see better photos. But from time to time you just want a zoom, and then I pick this lens of the shelf. 


zondag 6 januari 2013

Vivitar 135mm f/2.8 (made by Komine) review


Vivitar was a lens re-seller, and the serial numbers are an indicator who actually manufactured the lens. There is some difference in optical quality and exterior per manufacturer. You can check who made your lens on this list.
The serial number on my lens starts with 28 which means it’s made by Komine.


I think this is my favourite telephoto lens, as it gives quite a considerable reach on DX and it’s my fastest lens above 100mm. It is relatively light and small, which also makes it a great portrait lens as people tend to forget that this lens is capable of making a close-up portrait from a distance.

Handling the lens
In combination with my D60 this lens is just right. The weight is equally distributed and the combination is just large enough to stabilise it properly. As with most other 3rd party lenses, this lens uses oil to reduce friction when focussing. Although this generally won’t be a problem, the focus will become stiff when you expose the lens to low temperatures. However, as I said most 3rd party lenses from that time are built in the same way, and we can’t blame Vivitar (or Komine) for this.

Focussing is quite easy with the lens, the DoF is generally sufficient for minor movements between you and your subject when you recompose, and my keeper-rate is high enough. However, try to nail the focus when you make a portrait as the DoF can become quite shallow close-by at f2.8.


The lens has a metal hood which can’t be removed from the lens. Although it looks nice I’m not entirely convinced of the effectiveness of the hood as it doesn’t extend that far from the lens. I would have preferred if the hood could be removed, as it is hard to attach filters with the hood extended, and almost impossible to use the Cokin or Lee filter system, as the hood doesn’t go back far enough to allow the filter holder to slide over the coupling ring.

Results
As this is a telephoto lens, I generally use it to fill the frame with remote objects, so I focus relatively close to infinity. And as I don’t want my shutter to fall below 1/125th I shoot it wide open quite a lot. And I suspect that most people will, except when they make portraits of course. Be aware that most lenses won’t show their best properties when they are focussed at infinity wide open.
The lens needs some sharpening when you shoot it in these conditions, but after post processing, the images look very good. And when you close it down to f/4 it’s already much better.

these photos are taken near infinity, most of them at f/4 or f/2.8 and still show good quality, though not optimal
note: the deer in these photos are taken at a place where the deer are a bit used to humans. Although they are still wild animals, they are a bit more approachable than your average deer


When you focus closer, say you want to make a portrait, this lens can also be used wide open without much sharpening. I generally sharpen the eyes a bit, just to make the pop, but it is not a necessity.

As most older lenses, this lens does show some CA, but this was to be expected for a telephoto lens. And as the CA is very well within the correctable limits it doesn’t worry me at all. The only thing that annoys me from time to time is the colour shift you get in the bokeh. This is especially visible if there is an unsharp part in front and behind my focus, as the colours can change a bit. Luckily this effect doesn’t show every time, and it is not that pronounced.

Bokeh is generally quite good. Especially for portraits the bokeh coming from this lens is nothing short but amazing. However when you get closer to infinity, and the out of focus areas are just a bit out of focus and busy, the bokeh can become a bit distracting. But again, we can’t really blame that on the lens, as a lot more lenses react the same to this condition.


Conclusion
I am very satisfied with the Vivitar 135mm f/2.8 lens, because it gives great quality images, is relatively light and small. This combination makes this one of my favourite telephoto lenses as it is not a burden to take on a full-day trip, while it still delivers good images. However keep in mind that there are different manufacturers who are sold under the Vivitar brand name with different optical qualities. With some post-processing this lens is able to deliver images I am will to print on the full resolution my D60 offers me.
One note however, there are a lot of good 135mm’s out there, so don’t pay too much for this lens as there are probably some good alternatives as well.


Note
If you want to have the full resolution images, sent me an email, but I don’t like to put up full resolution images on the internet.  


vrijdag 30 november 2012

Rut 2012


Although very late, the blogpost about the rut of 2012 is finally here. This year, the weather did not wanted to cooperate. Most of the times, there were a lot of clouds meaning soft not-dramatic light, and it rained a lot. Nevertheless I could not resist going, which was rewarded every time.
This year started of with a great day, the weather was good, and we got some amazing light the last 3 hours before the sun went down. Because I thought the rut hadn’t really started yet I wandered of from the usual arena to a big field nearby. It turned out there were a lot of deer, waiting for the night to fall. I crossed the field, but all of a sudden I heard a fight going on nearby. I ran back to the field, and crouched behind a hill trying to prevent disturbance. 2 deer started were fighting like it was their last day. Sand was going through the air, and they just didn’t stop. And most importantly, they did not run away after a fight.


Usually when you see a fight, you are lucky to see 2 or 3 “strikes” but with these men showed me their whole fight. When they were finished, and one had clearly won the last few strikes, the defeated one ran away, while the winner was approaching me. I backed away silently, and saw him walking up “my” hill. And he just stood there, in the best light I could have imagined. Although I had mounted my camera on a tripod, I could see the shaking of my hands in the viewfinder, as I was pumped with adrenaline.


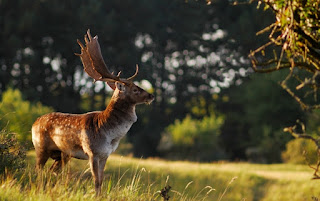
After this day, nothing compared to that day again. The weather got worse, and it rained a lot. When the rut was almost over I decided to try one more time, ignoring the rain. With rain clothes and a watertight bag, I tried one more time. After an hour walking I was lucky enough for the clouds to break, just when I spotted a deer. The deer didn’t mind me at all, and as long as I stayed on the path, he wouldn’t run away. Using a 135mm, I was able to get this image. I was that close, and he didn’t mind at all. When this moment was over, I walked past him, and he just kept looking at me. With that curious deer, the rut was over for me.


Time to concentrate on some landscapes. 

donderdag 6 september 2012

macro photography and flash


Macro photography can be pretty light consuming. You want to maximize depth of field, so you close your aperture to f/11, or even smaller. To get to greater magnifications you might use extension tubes, reducing the light reaching your sensor as well. Or to get rid of the harsh shadows you put a scrim over your working area, etc. To put it shortly, some extra light would be nice.


The first time I encountered this, I was still photographing with a point and shoot. But firing the flash was no option, as I found out that the lens barrel was blocking most of the light. Unfortunately most of the on camera flashes will not be useful for macro photography because of this.

However, there’s also external flashes. I have always been very enthusiastic about external flashes, and the moment I started with macro photography I have been using them. Basically you can use them in two ways, on your hot shoe (on-camera) or external. First I will cover on-camera use.

On-camera use of our flashes is the easiest way of using them. If you use modern lenses and flashes they even communicate to each other, and make a good exposure. But even without this auto-exposure you are very well able to make good photographs. Typically the distance to your lens doesn’t change much, as you want to keep a certain magnification. So the area between the subject and your flash doesn’t change.
A commonly heard complaint about flashes is that they produce hard ugly light. First of all hard light can be really beautiful (but that will be another post in the future), but the light coming from your flash actually is really soft. Your subject matter is really small compared to your flash head, and your flash will be close to your subject, so the light from your flash is still able to wrap around your subject. I took this photo with my SB-24 mounted on my camera, with a diffuser dome.
As you can see, it doesn’t look like your typical hot shoe mounted flash picture, as the light is quite soft.


However, there are disadvantages, as your distance from flash to subject is very small, you will get fast fall-off. If your exposure mainly depends on the flash output, you will get dark backgrounds. You could search for backgrounds which are also quite close to your subject, which will catch more light. Don’t be afraid of distracting backgrounds, as they will be out of focus anyway, due to the small DoF.
Or you could make use of your ambient light. The photo shown above is taken 1 o’clock, in the harsh sun. Even though my flash is my main light, the sun increased the exposure on my background. (That’s why I like to do macro photography, since I’m able to control my exposures anyway, I can do it at any time of the day)

Off camera flash is another option. It can create more dramatic light, and I like it better than on-camera flash. However, compared to on-camera flash, you are less mobile, since you also have to move your light. Besides that, if your subject moves, your flash exposure will change as well. This can be especially difficult since most of us will be using non-TTL triggers / cords / non-TTL flashes. I just hope for the best, and try to move my flash along with my camera, and usually I’ll be all right. Don’t get discouraged because you blow a few exposures, because after some practise you will remember to move your flash.


Again, you don’t have to diffuse the light that much, although I like to diffuse it more. Soft light is more forgiving, and also will create less harsh shadows. (Again, the sun can be your friend and can fill up the shadows) As I use extension tubes, most of my pictures mainly depend on flash for their exposures. This can result in very dark shadows on the other side of your subject. (As you can see in the photo below) Normally an envelope put over the head of the flash is enough, providing very soft light.

So basically, if you want to be very mobile, or your subject moves a lot, mounting the flash on your camera can be a good option. But I prefer to fire my flash from a slight angle to my subjects, so when I can, I will use my flash off-camera. 


zaterdag 25 augustus 2012

Processing images from the blue / yellow polarizer


As written in my previous article  there is a strong colourcast over your images when you use your blue/yellow polarizer. In the beginning, this filter can be hard to get good images of, your white balance panics when it sees all these unnatural colours. There’s the colourcast of the filter, and then there are the unnaturally saturated reflections. Who could blame your white balance.

Now, the solution seems obvious, just turn to a preset of your camera, as the auto white balance is fooled. Well, there’s still the colourcast. Normally I just shoot RAW, and worry about correcting the colours later. The reason for doing so, is because it’s not about the colour temperature, but about the tint (green/magenta slider). And besides that, sometimes the colourcast can add something even more unrealistic to your images. 

When I open my images in Capture NX, I go to the colour correcting dialogue. First I will adjust the green/magenta slider. I will add somewhere between 2 to 5 (no idea what values to be used in lightroom/aperture) This will correct for the magenta-ish colourcast. After that, the image usually still has some issues, and I will decrease the colour temperature (make it colder) as usually there is still too much red in the image.

After this, the image will look comparable to what you actually saw through the filter, but it may take some tweaking for every image. However I think the results from this filter are more than worth it. 

zondag 1 juli 2012

Composing for wildlife


I like to go to the Amsterdamse Waterleidingsduinen, a nature reserve in the Netherlands were there are a lot of wild deer. Well wild, they are pretty approachable, you can make very good pictures with a 200mm of them. The thing is, the photos I took of them were they were most visible, also were the most boring pictures. It took me some time to figure out that a 300mm lens is usually overkill for this area. You get way too close for an environmental portrait, while you are still too far away for a headshot. (no pun intended)


The photo above is an example, the deer is quite dominant in this photo, but the photo isn’t interesting at all. There’s nothing happening, and you can’t see where he’s looking at. This photo is taken with a 300mm, and I regret doing so. (although if I’m honest, I don’t think this photo would have improved if I took it with another focal length)


This photo is taken with a 135mm at f/4, and you can still see a lot of the deer’s surroundings. It makes a more interesting photo because I included more of the surroundings. You can see where he’s going, and you can see that the area wasn’t very open. And to be honest the light is better than in the previous photo.

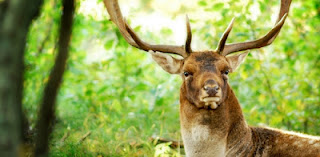
Now, I did not mean that I’m trying to make photos with the shortest focal length possible. I think there is definitely a place for telephoto lenses. For example this shot, is taken with my 300mm, but I was much closer to this deer than I was with the first photo. This is more of a headshot, and I think, also makes an interesting photo.


The point I’m trying to make, is that you don’t necessarily need to go for your longest lens, or totally zoom in your zoom lens. When you can’t get close enough, it doesn’t improve your photo. Sometimes it is better to use a shorter focal length, and show the animal in its surroundings. Think more about your actual composition, and try not to be locked into the idea I need to get as close as possible.